 E-CommerceGenerative AI in Online Retail: Uses That Pay BackGenerative AI ecommerce uses ranked by payback and risk: product descriptions, AI search and support assistants, plus Arabic quality checks for UAE stores.
Mailchimp WooCommerce Integration: Setup and Best Practices
How to connect Mailchimp to WooCommerce with the official plugin or the API, which automations to build first, and the mistakes to avoid.
The quickest way to connect Mailchimp to WooCommerce is the free Mailchimp for WooCommerce plugin, which syncs customers, products and orders into a Mailchimp audience and adds a newsletter opt-in at checkout. If you need custom triggers, extra data or tighter control over what syncs, you can build the integration on the Mailchimp Marketing API instead. Either way, the payoff is automated, targeted email driven by real purchase data.
This guide covers both setup methods, the automations worth building first, and the mistakes that stop an integration from paying off.
Why connect Mailchimp to your WooCommerce store
WooCommerce knows who bought what and when. Mailchimp knows how to send the right email to the right person. Connecting them means your email list stops being a static list of addresses and becomes a picture of real customer behavior.
Without the connection, store owners usually export CSV files, upload them by hand and send the same newsletter to everyone. With it, a first time buyer, a repeat customer and someone who left a full cart can each receive a different message without anyone touching a spreadsheet.
Method 1: the Mailchimp for WooCommerce plugin
The official plugin is built and maintained by Mailchimp and listed on WordPress.org, where it shows WooCommerce as a required plugin and a recent update history. It suits most stores.
Before you start
- WooCommerce is installed, activated and taking orders.
- You have a Mailchimp account with an audience ready, or you are happy for the plugin to create one.
- Your privacy policy explains that customer data is shared with an email platform.
- You have a recent backup of the site.
Setup steps
- In WordPress, go to Plugins, search for Mailchimp for WooCommerce, then install and activate it.
- Open the plugin settings and connect your Mailchimp account. You will be asked to log in and authorize access.
- Fill in store details such as address, currency, locale and time zone, so reports and send times line up with your store.
- Choose the audience to sync and decide how opt-in works. Set the checkout checkbox wording and whether it is ticked or unticked by default, in line with the consent rules that apply to your customers.
- Where the settings allow it, choose whether existing customers who never opted in are synced as transactional contacts only, so they receive order related email but not marketing.
- Start the sync. Large stores can take a while, so let it finish before testing.
- Place a test order using a fresh email address and confirm the contact, order and products appear in Mailchimp.
The plugin is free. Mailchimp itself has free and paid plans, and some automations and features depend on the plan you choose, so check the plan details before building flows.
Method 2: a custom integration with the Mailchimp API
The plugin covers standard needs. A custom integration makes sense when you need things the plugin does not do, for example syncing custom fields, sending events from a subscription or booking plugin, or combining store data with a CRM.
Mailchimp's E-commerce Stores API lets developers register a store and push customers, products, carts and orders. On the WooCommerce side, developers hook into order and cart events, or read from the WooCommerce REST API, and send the data to Mailchimp.
When the API route is worth it
- Custom triggers: send events such as a subscription renewal failing or a booking being confirmed.
- Extra data: sync loyalty tier, preferred branch, trade account status or other fields as merge fields and tags.
- Control: decide exactly which customers and products sync and how often.
- Multiple systems: keep Mailchimp, WooCommerce and a CRM consistent, rather than letting each plugin write its own version of a contact.
- Reporting: feed campaign results back into your own dashboards.
What to plan for
Store API keys securely, never in theme files. Handle rate limits and retries so a busy sale day does not drop orders from the sync. Log failures so someone notices when data stops flowing. And keep consent status in sync in both directions, so an unsubscribe in Mailchimp is respected everywhere.
| Factor | Official plugin | Custom API integration |
|---|---|---|
| Setup effort | Mostly configuration, no code | A development project |
| Data synced | Customers, products, orders, carts | Anything you define |
| Custom events | Limited | Fully flexible |
| Maintenance | Plugin updates | Code you own and must maintain |
| Best for | Standard retail stores | Subscriptions, B2B, multi-system setups |
Automations to build first
Once data is flowing, start with the automations that respond to clear customer actions. They tend to deliver the most value for the least effort.
Welcome series
Greet new subscribers, explain what makes your store different and point them to best sellers or a useful guide. Two or three emails are usually enough.
Abandoned cart reminders
Remind shoppers about items left in their cart. Keep the message helpful: show the products, link straight back to the cart and answer common objections such as delivery times or returns.
Post-purchase follow-ups
Thank the customer, share care or usage tips, ask for a review and suggest related products once enough time has passed for the first order to arrive.
Win-back emails
Reach customers who have not ordered for a while with something relevant to what they bought before, not a generic blast.
Segmentation and personalization
Purchase data makes segments far more useful than demographics alone. Practical segments include:
- First time buyers versus repeat customers
- Customers who bought from a specific category
- High value customers by total spend
- Subscribers who have never purchased
- Customers in a particular city or delivery zone
Use these to change the content, not just the greeting. Product recommendations based on past orders and category specific offers usually beat a newsletter that tries to speak to everyone.
Measure what matters
Open rates are a weak signal, because privacy features in some email apps can inflate them. Focus on clicks, orders and revenue attributed to each campaign and automation in Mailchimp's e-commerce reports, then check the numbers against WooCommerce orders. Test one change at a time, such as subject line, send time or offer, so you know what made the difference.
Common mistakes to avoid
- Syncing everyone as a marketing subscriber. Customers who did not opt in should not receive promotional email. Respect consent from the start.
- Skipping the test order. Always confirm a real order reaches Mailchimp with the right products and totals.
- Running two sync plugins. Two tools writing to the same audience create duplicates and conflicting tags.
- Ignoring product data quality. Missing images or messy titles in WooCommerce show up in every product recommendation email.
- Set and forget. Review automations every few months. Offers expire, products change and links break.
Getting help with the integration
For most stores, the plugin and a handful of well planned automations are enough. When you need custom events, CRM sync or a store with unusual data, it is worth having developers design the integration properly. Codeeo's WooCommerce developers build and connect stores like the Ghezlan veterinary supply store, our digital marketing team can plan the email program around it, and sales automation work can connect email with your CRM. See more retail and ecommerce work or get in touch to discuss your store.
Frequently asked questions
Install the free Mailchimp for WooCommerce plugin from the WordPress plugin directory, activate it, and connect your Mailchimp account from the plugin settings.
Enter your store details, choose an audience, set your checkout opt-in options and start the sync. When it finishes, place a test order with a new email address to confirm customers and orders appear in Mailchimp.
E-CommerceGenerative AI in Online Retail: Uses That Pay BackGenerative AI ecommerce uses ranked by payback and risk: product descriptions, AI search and support assistants, plus Arabic quality checks for UAE stores.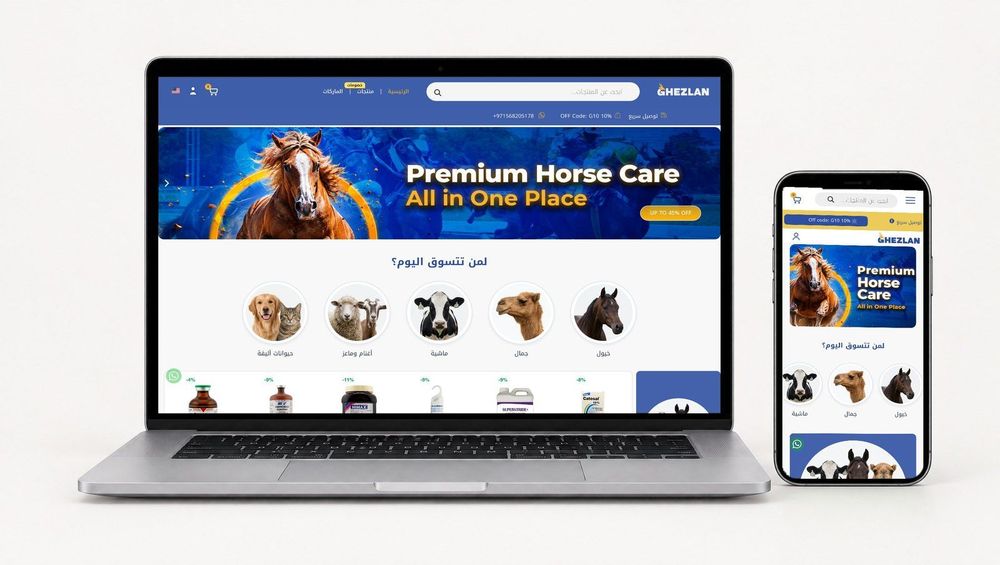 E-CommerceConnecting WooCommerce to ERP, CRM and Shipping Without DuplicatesPlan a WooCommerce ERP integration that avoids duplicates: data ownership rules, idempotent order sync, CRM matching and UAE shipping, with Odoo and Dynamics.
 E-CommerceEnterprise Ecommerce Platform Selection: Requirements Before DemosChoose an enterprise ecommerce platform by setting integration, multi entity, data residency and order management requirements before any vendor demo starts.
Tell us what the business needs. We will tell you what to build first.
Schedule a free consultation and get a written recommendation, with costs, before you commit to anything.
Get in touchPROVEN RESULTS
4.7 / 5verified reviews on Google