 E-CommerceGenerative AI in Online Retail: Uses That Pay BackGenerative AI ecommerce uses ranked by payback and risk: product descriptions, AI search and support assistants, plus Arabic quality checks for UAE stores.
Shopify Product Page Customization: A Step by Step Guide
How to customize a Shopify product page with sections, metafields, apps and code, what a converting page includes, and the mistakes that cost sales.
Shopify product page customization means changing the layout, content and features of your product template so it answers a shopper's questions and makes buying easy. Most of it can be done in the theme editor without code, using sections, blocks and metafields; deeper changes need edits to the theme's Liquid, CSS and JavaScript files. The goal is simple: fewer doubts on the page, more people clicking Add to cart.
A default product page usually shows a title, a price, a few photos, a description and a button. That is enough to sell, but it rarely sells well. This guide covers what a converting product page needs, how to customize it step by step in a current Shopify theme, when to bring in a developer, and the mistakes that quietly cost sales.
Why customize your Shopify product page
The product page is where the buying decision happens. Shoppers arrive from ads, search results and collection pages with questions: Will it fit? When will it arrive? Can I return it? Is it any good? A page that answers those questions quickly converts better than one that leaves people hunting.
Customization also helps in ways that go beyond conversion:
- Brand consistency. Free themes look similar across thousands of stores. Adjusting typography, spacing, imagery and copy makes the store feel like yours, which builds trust.
- Better product information. Different products need different details. A furniture store needs dimensions and materials; a skincare brand needs ingredients and usage.
- Search visibility. Unique descriptions, structured content and fast pages give search engines more to work with than a copied manufacturer description.
- Fewer apps. Some features stores add through apps, such as size charts or tabs, can be built into the theme, which often makes pages lighter and faster.
What a high converting product page includes
Before you change anything, decide what the page needs. These elements show up on most strong product pages:
| Element | What it answers | How to add it in Shopify |
|---|---|---|
| Multiple images and video | What does it really look like? | Product media in the admin; gallery settings in the theme editor |
| Clear variant pickers | Which size or color do I need? | Product variants, shown as buttons or swatches in the theme |
| Specifications | Will it fit or work for me? | Metafields displayed through dynamic sources or a collapsible row |
| Shipping and returns | When will it arrive, and what if it is wrong? | Collapsible row blocks or a shared page linked from the product |
| Reviews | Do other buyers like it? | A reviews app block placed near the buy button |
| FAQs | What about my specific worry? | Collapsible rows or a metafield driven FAQ section |
| Related products | What else goes with it? | The related or complementary products section |
How to customize a Shopify product page step by step
Shopify's current themes use Online Store 2.0 architecture. Product templates are JSON files that list which sections appear and in what order, so most layout changes happen in the visual editor rather than in code. Shopify's developer documentation on JSON templates explains the model if you want the detail.
1. Duplicate your theme first
In the Shopify admin, go to Online Store, then Themes. Open the menu next to your live theme and choose Duplicate. Make your changes on the copy, preview them, and publish only when you are happy. This keeps a clean fallback if something breaks.
2. Open the theme editor on a product page
Click Customize on the duplicated theme. Use the page selector at the top to switch from the home page to Products, then to the default product template. Everything you see in the left panel is a section or a block you can show, hide, reorder or configure.
3. Rearrange and configure the main product section
The main product section holds blocks such as title, price, variant picker, quantity, buy buttons, description and collapsible rows. Drag them into the order that matches how shoppers decide. A common pattern puts title, price, variants and the buy button high, with reassurance (shipping, returns, reviews) directly under the button.
4. Create alternate templates for different product types
Not every product should share one layout. From the template menu you can create a new product template, for example one for bundles or one for made to order items, and assign it to specific products in the admin. This avoids cramming every possible block onto a single template.
5. Add custom fields with metafields
Metafields store extra product data such as dimensions, materials, care instructions or a size chart. Define them once in the metafields area of your admin settings, fill them per product, and connect them to theme blocks using dynamic sources. One template can then show different content for every product without manual edits.
6. Add apps through app blocks
Reviews, subscriptions, upsells and wishlists usually come from apps. Modern apps install as app blocks that you place in the theme editor, so no code is pasted into theme files. Install only what you will use, because every app can add scripts that slow the page.
7. Edit theme code for changes the editor cannot make
When the editor is not enough, open the menu on your duplicate theme and choose Edit code. In most current themes the product layout lives in a section file such as main-product.liquid, with styles in the assets folder. Typical code level changes include a custom size guide, a sticky add to cart bar on mobile, a bundle builder or a new block type. Keep custom code in clearly named files and comment it, so future theme updates are easier to merge.
8. Set product SEO fields
At the bottom of each product in the admin, edit the search engine listing: page title, meta description and URL handle. Write a unique description for each product instead of copying the supplier's text, and add descriptive alt text to every image.
9. Preview, test and publish
Preview the duplicate on desktop and on a real phone. Check every variant, add to cart, the cart drawer and checkout. Test with products that have many variants, long titles and missing images, because edge cases break layouts. Publish once it works, and keep the previous theme for a while in case you need to roll back.
Theme editor, apps or custom code: which route to take
Most stores use a mix of all three. The right balance depends on how unusual your products are and how much you care about speed.
| Route | Best for | Trade off |
|---|---|---|
| Theme editor | Layout, order of blocks, colors, fonts, collapsible content | Limited to what the theme exposes |
| Apps | Reviews, subscriptions, upsells, complex product options | Extra scripts, recurring fees, dependency on a third party |
| Custom code | Unique layouts, custom calculators, bundle builders, speed tuning | Needs a developer and care during theme updates |
One issue we often see is a product page carrying several apps that each load their own scripts for small features. Replacing two or three of them with theme code can make the page noticeably faster without losing anything the shopper sees.
Common mistakes that hurt conversion
- Burying the buy button. On mobile, shoppers should not scroll past long text to find Add to cart.
- Hiding shipping and return details. Surprise costs or unclear policies at checkout are a classic reason for abandoned carts.
- Too many popups and badges. Urgency timers and stacked badges distract more than they persuade.
- Heavy, unoptimized media. Large images and autoplay video slow the page. Use Shopify's image handling and compress video.
- Editing the live theme. A small typo in Liquid can break the product page for every visitor.
- Never measuring. Track add to cart rate and conversion before and after changes so you know which edits helped.
When to bring in a Shopify developer
You can handle layout and content yourself. A developer is worth it when you need features the theme does not offer, when app bloat is hurting speed, when product data comes from an ERP or PIM, or when you want a design that does not look like a stock theme. A developer can also set up a proper workflow with a development theme and version control, so changes are tested before shoppers see them.
For an example of what custom work looks like in practice, our EGO Sustainable case study covers a bilingual Shopify store for a GCC athleisure label with Tabby and Tamara across five markets.
Next steps
Start by listing the questions shoppers ask before buying, then make sure the product page answers each one near the buy button. Use the theme editor and metafields first, apps second and custom code where it earns its place. If you want a team to design or build the page, our Shopify developers handle theme customization, app replacement and integrations, and the checkout teardown reviews where your current funnel loses buyers. Codeeo has delivered 200+ projects across the UAE and the US, and you can see more retail and ecommerce work or get in touch to talk through your store.
Frequently asked questions
Yes.
In current Online Store 2.0 themes you can reorder blocks, add collapsible rows, change fonts and colors, create alternate templates and show metafield content through the theme editor without touching code. Code is only needed for features the theme does not support, such as a custom bundle builder, a unique layout or a sticky mobile add to cart bar that your theme lacks.
E-CommerceGenerative AI in Online Retail: Uses That Pay BackGenerative AI ecommerce uses ranked by payback and risk: product descriptions, AI search and support assistants, plus Arabic quality checks for UAE stores.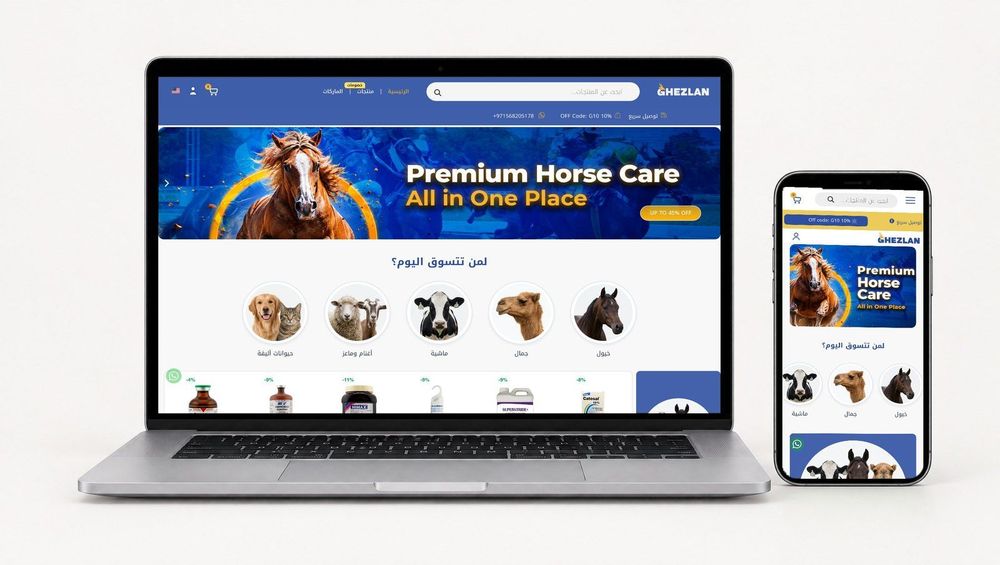 E-CommerceConnecting WooCommerce to ERP, CRM and Shipping Without DuplicatesPlan a WooCommerce ERP integration that avoids duplicates: data ownership rules, idempotent order sync, CRM matching and UAE shipping, with Odoo and Dynamics.
 E-CommerceEnterprise Ecommerce Platform Selection: Requirements Before DemosChoose an enterprise ecommerce platform by setting integration, multi entity, data residency and order management requirements before any vendor demo starts.
Tell us what the business needs. We will tell you what to build first.
Schedule a free consultation and get a written recommendation, with costs, before you commit to anything.
Get in touchPROVEN RESULTS
4.7 / 5verified reviews on Google